Nachfolgend eine kurze Anleitung zur Installation von oVirt 3.6 auf CentOS 7 als All-in- One Installation. Dies bedeutet, dass die Hosted-Engine in einer eigenen virtuellen Maschine läuft und nicht wie z.B. bei der Self-Hosted Installation auf dem Host selbst.
Nachfolgend einige Stichpunkte zu meiner Testinstallation….
Die Installation erfolgt in 2 Schritten. Erst wird die Software oVirt installiert und im zweiten Teil die Engine, die für die Steuerung der virtuellen Maschinen und des Systems sowie für HA genutzt wird.
Voraussetzungen
oVirt Host = ovirt1.myDomain.com
oVirt Engine = hostengine1.myDomain.com
NFS ISO Pfad = /var/ovirt/exports/iso
NFS DATA Pfad = /var/ovirt/exports/data
VM für HostEngine mit
- min 20GB Disk
- min 4GB RAM
- min 2 vCPUs
Hostnamen prüfen
Der Hostname muss auflösbar sein, also der Name des Systems in eine IP-Adresse. Dies kann durch einen DHCP /DNS mit Reservierung passieren oder statisch in die hosts eingetragen werden.
# cat /etc/hosts
127.0.0.1 localhost localhost.localdomain localhost4 localhost4.localdomain4
::1 localhost localhost.localdomain localhost6 localhost6.localdomain6
192.168.0.10 ovirt1.localdomain # statischer Eintrag für ovirt1 wenn kein DHCP /DNS läuft
VM Erweiterung prüfen
Prüfen ob die CPU AMD-V oder Intel VT-X kann bzw. ob es im BIOS aktiviert wurde:
# egrep -c ‚(vmx|svm)‘ /proc/cpuinfo
4
Wenn die 4 angezeigt wird, bedeutet dies das die CPU virtualisierung unterstützt und im BIOS aktiviert wurde.
Vorbereitungen
System aktualisieren
- Epel Release installieren
- # yum -y install epel-release
- # yum -y check-update
- # yum -y update
Installation NFS4 Server
- NFS Installieren
- NFS V4 Server Installation
- Ordner für ISO Domain erstellen
- # mkdir -p /var/ovirt/exports/iso
- Ordner für VM-Engine erstellen
- # mkdir -p /var/ovirt/exports/engine
- Ordner für VM-Engine Data erstellen
- # mkdir -p /var/ovirt/exports/data
- NFS Export für ISO, Engine und Data in etc/exports erstellen, für jeden
- /var/ovirt/exports/iso *(rw,anonuid=36,anongid=36,all_squash)
- /var/ovirt/exports/engine *(rw,anonuid=36,anongid=36,all_squash)
- /var/ovirt/exports/data *(rw,anonuid=36,anongid=36,all_squash)
- oder nur für den Host /var/ovirt/exports/iso IP-Adresse/24(rw,anonuid=36,anongid=36,all_squash)
Installation oVirt Hosted-Engine
- oVirt 3.6 Repository hinzufügen
- # yum -y install http://resources.ovirt.org/pub/yum-repo/ovirt-release36.rpm
- notwendige Pakete installieren
- # yum install -y ovirt-hosted-engine-setup
- Screen zwecks Sitzungssicherung installieren
- # yum install -y screen
- NFS Share für Data, Engine und ISO berechtigen vdsm
user (UID 36) and kvmgroup (GID 36)- # chown -R 36:36 /var/ovirt/exports/
- Export der NFS Shares
- # exportfs -rv
- CentOS ISO für oVirt Engine ablegen
- # cd /var/ovirt/exports/
- # curl -O http://mirrors.kernel.org/centos/7.2.1511/isos/x86_64/CentOS-7-x86_64-Minimal-1511.iso
- # chown -R 36:36 /var/ovirt/exports/iso
- Network Manager stoppen
- # systemctl disable NetworkManager && systemctl stop NetworkManager
- Firwall stoppen, IPTables aktivieren
-
# systemctl disable firewalld && systemctl enable iptables
-
- Install oVirt Hosted-Engine
- # screen hosted-engine –deploy
- [ INFO ] Stage: Initializing
[ INFO ] Generating a temporary VNC password.
[ INFO ] Stage: Environment setup
Continuing will configure this host for serving as hypervisor and create a VM where you have to install the engine afterwards.
Are you sure you want to continue? (Yes, No)[Yes]:
Configuration files: []
Log file: /var/log/ovirt-hosted-engine-setup/ovirt-hosted-engine-setup-20160316001654-bxd3gq.log
Version: otopi-1.4.1 (otopi-1.4.1-1.el7.centos)
[ INFO ] Hardware supports virtualization
[ INFO ] Stage: Environment packages setup
[ INFO ] Stage: Programs detection
[ INFO ] Stage: Environment setup
[ INFO ] Waiting for VDSM hardware info
[ INFO ] Waiting for VDSM hardware info
[ INFO ] Generating libvirt-spice certificates
[ INFO ] Stage: Environment customization
–== STORAGE CONFIGURATION ==–
During customization use CTRL-D to abort.
Please specify the storage you would like to use (glusterfs, iscsi, fc, nfs3, nfs4)[nfs3]:nfs4
Please specify the full shared storage connection path to use (example: host:/path): ovirt1:/var/ovirt/exports/data
[ INFO ] Installing on first host
–== SYSTEM CONFIGURATION ==–
–== NETWORK CONFIGURATION ==–
Please indicate a nic to set ovirtmgmt bridge on: (enp0s29u1u1c2, enp0s25) [enp0s29u1u1c2]: enps25
iptables was detected on your computer, do you wish setup to configure it? (Yes, No)[Yes]:
Please indicate a pingable gateway IP address [192.168.0.3]:
–== VM CONFIGURATION ==–
Booting from cdrom on RHEL7 is ISO image based only, as cdrom passthrough is disabled (BZ760885)
Please specify the device to boot the VM from (choose disk for the oVirt engine appliance)
(cdrom, disk, pxe) [disk]:cdrom
The following CPU types are supported by this host:
– model_SandyBridge: Intel SandyBridge Family
– model_Westmere: Intel Westmere Family
– model_Nehalem: Intel Nehalem Family
– model_Penryn: Intel Penryn Family
– model_Conroe: Intel Conroe Family
Please specify the CPU type to be used by the VM [model_SandyBridge]:
Please specify path to installation media you would like to use [None]: /var/ovirt/exports/iso/CentOS-7-x86_64-Everything-1503-01.iso
Please specify the number of virtual CPUs for the VM [Defaults to minimum requirement: 2]:
Please specify the disk size of the VM in GB [Defaults to minimum requirement: 25]:
You may specify a unicast MAC address for the VM or accept a randomly generated default [00:16:3e:12:48:19]:
Please specify the memory size of the VM in MB [Defaults to minimum requirement: 4096]:
Please specify the console type you would like to use to connect to the VM (vnc, spice) [vnc]:
–== HOSTED ENGINE CONFIGURATION ==–
Enter the name which will be used to identify this host inside the Administrator Portal [hosted_engine_1]:
Enter ‚admin@internal‘ user password that will be used for accessing the Administrator Portal:
Confirm ‚admin@internal‘ user password:
Please provide the FQDN for the engine you would like to use.
This needs to match the FQDN that you will use for the engine installation within the VM.
Note: This will be the FQDN of the VM you are now going to create,
it should not point to the base host or to any other existing machine.
Engine FQDN: []:
Please provide the name of the SMTP server through which we will send notifications [localhost]:
Please provide the TCP port number of the SMTP server [25]:
Please provide the email address from which notifications will be sent [root@localhost]:
Please provide a comma-separated list of email addresses which will get notifications [root@localhost]:
[ INFO ] Stage: Setup validation
–== CONFIGURATION PREVIEW ==–
Bridge interface : enp0s25
Engine FQDN : hostengine1.mydomain.com
Bridge name : ovirtmgmt
Host address : ovirt1.myDomain
SSH daemon port : 22
Firewall manager : iptables
Gateway address : 192.168.0.3
Host name for web application : hosted_engine_1
Host ID : 1
Image size GB : 25
GlusterFS Share Name : hosted_engine_glusterfs
GlusterFS Brick Provisioning : False
Storage connection : ovirt1:/var/ovirt/exports/data
Console type : vnc
Memory size MB : 4096
MAC address : 00:16:3e:12:48:19
Boot type : cdrom
Number of CPUs : 2
ISO image (cdrom boot/cloud-init) : /var/ovirt/exports/iso/CentOS-7-x86_64-Everything-1503-01.iso
CPU Type : model_SandyBridgePlease confirm installation settings (Yes, No)[Yes]:
[ INFO ] Stage: Transaction setup
[ INFO ] Stage: Misc configuration
[ INFO ] Stage: Package installation
[ INFO ] Stage: Misc configuration
[ INFO ] Configuring libvirt
[ INFO ] Configuring VDSM
[ INFO ] Starting vdsmd
[ INFO ] Waiting for VDSM hardware info
[ INFO ] Waiting for VDSM hardware info
[ INFO ] Configuring the management bridge
[ INFO ] Creating Storage Domain
[ INFO ] Creating Storage Pool
[ INFO ] Connecting Storage Pool
[ INFO ] Verifying sanlock lockspace initialization
[ INFO ] Creating Image for ‚hosted-engine.lockspace‘ …
[ INFO ] Image for ‚hosted-engine.lockspace‘ created successfully
[ INFO ] Creating Image for ‚hosted-engine.metadata‘ …
[ INFO ] Image for ‚hosted-engine.metadata‘ created successfully
[ INFO ] Creating VM Image
[ INFO ] Destroying Storage Pool
[ INFO ] Start monitoring domain
[ INFO ] Configuring VM
[ INFO ] Updating hosted-engine configuration
[ INFO ] Stage: Transaction commit
[ INFO ] Stage: Closing up
[ INFO ] Creating VM
You can now connect to the VM with the following command:
/bin/remote-viewer vnc://localhost:5900
Use temporary password „0895BzMS“ to connect to vnc console.
Please note that in order to use remote-viewer you need to be able to run graphical applications.
This means that if you are using ssh you have to supply the -Y flag (enables trusted X11 forwarding).
Otherwise you can run the command from a terminal in your preferred desktop environment.
If you cannot run graphical applications you can connect to the graphic console from another host or connect to the serial console using the following command:
socat UNIX-CONNECT:/var/run/ovirt-vmconsole-console/5b6c6689-3356-467a-a794-e88a8781b58d.sock,user=ovirt-vmconsole STDIO,raw,echo=0,escape=1
Please ensure that your Guest OS is properly configured to support serial console according to your distro documentation.
Follow http://www.ovirt.org/Serial_Console_Setup#I_need_to_access_the_console_the_old_way for more info.
If you need to reboot the VM you will need to start it manually using the command:
hosted-engine –vm-start
You can then set a temporary password using the command:
hosted-engine –add-console-password The VM has been started.
To continue please install OS and shutdown or reboot the VM.Make a selection from the options below:
(1) Continue setup – OS installation is complete
(2) Abort setup
(3) Power off and restart the VM
(4) Destroy VM and abort setup(1, 2, 3, 4)[1]: - nun mittels VNCViewer, z.B. von einem anderen Client den Host:5900 und das angezeigte Passwort aufrufen, der Host reicht dann zur Engine weiter
- dort erfolgt dann die Installation von CentOS 7 mit dem oben angegebenen Passwort als Engine
- abschließend die Installation beenden und warten bis neugestartet wurde
- auf dem Host dann die Option 1 eingeben
(1) Continue setup – OS installation is complete
Please reboot or shutdown the VM.Verifying shutdown…
[ INFO ] Creating VM
You can now connect to the VM with the following command:
/bin/remote-viewer vnc://localhost:5900
Use temporary password „0895BzMS“ to connect to vnc console.
Please note that in order to use remote-viewer you need to be able to run graphical applications.
This means that if you are using ssh you have to supply the -Y flag (enables trusted X11 forwarding).
Otherwise you can run the command from a terminal in your preferred desktop environment.
If you cannot run graphical applications you can connect to the graphic console from another host or connect to the serial console using the following command:
socat UNIX-CONNECT:/var/run/ovirt-vmconsole-console/5b6c6689-3356-467a-a794-e88a8781b58d.sock,user=ovirt-vmconsole STDIO,raw,echo=0,escape=1
Please ensure that your Guest OS is properly configured to support serial console according to your distro documentation.
Follow http://www.ovirt.org/Serial_Console_Setup#I_need_to_access_the_console_the_old_way for more info.
If you need to reboot the VM you will need to start it manually using the command:
hosted-engine –vm-start
You can then set a temporary password using the command:
hosted-engine –add-console-password
Please install and setup the engine in the VM.
You may also be interested in installing ovirt-guest-agent-common package in the VM.The VM has been rebooted.
To continue please install oVirt-Engine in the VM
(Follow http://www.ovirt.org/Quick_Start_Guide for more info).Make a selection from the options below:
(1) Continue setup – oVirt-Engine installation is ready and ovirt-engine service is up
(2) Abort setup
(3) Power off and restart the VM
(4) Destroy VM and abort setup(1, 2, 3, 4)[1]: - nun z.B. mittels SSH vom Host mit der Engine-VM verbinden und die oVirt Hosted Engine installieren:
- oder mittels VNCViewer: Keyboard mittels # loadkeys us korrigieren
- # yum -y install epel-release
- # yum check-update
- # yum update
- # yum upgrade
- # yum install -y http://resources.ovirt.org/pub/yum-repo/ovirt-release36.rpm
- # yum install -y ovirt-engine
- # engine-setup
[ INFO ] Stage: Initializing
[ INFO ] Stage: Environment setup
Configuration files: [‚/etc/ovirt-engine-setup.conf.d/10-packaging-jboss.conf‘, ‚/etc/ovirt-engine-setup.conf.d/10-packaging.conf‘]
Log file: /var/log/ovirt-engine/setup/ovirt-engine-setup-20160316101816-69va1v.log
Version: otopi-1.4.1 (otopi-1.4.1-1.el7.centos)
[ INFO ] Stage: Environment packages setup
[ INFO ] Stage: Programs detection
[ INFO ] Stage: Environment setup
[ INFO ] Stage: Environment customization
–== PRODUCT OPTIONS ==–
Configure Engine on this host (Yes, No) [Yes]:
Configure VM Console Proxy on this host (Yes, No) [Yes]:
Configure WebSocket Proxy on this host (Yes, No) [Yes]:
–== PACKAGES ==–
[ INFO ] Checking for product updates…
[ INFO ] No product updates found
–== ALL IN ONE CONFIGURATION ==–
–== NETWORK CONFIGURATION ==–
Host fully qualified DNS name of this server [hostengine1.mydomain.com]:
Setup can automatically configure the firewall on this system.
Note: automatic configuration of the firewall may overwrite current settings.
Do you want Setup to configure the firewall? (Yes, No) [Yes]:
[ INFO ] firewalld will be configured as firewall manager.
–== DATABASE CONFIGURATION ==–
Where is the Engine database located? (Local, Remote) [Local]:
Setup can configure the local postgresql server automatically for the engine to run. This may conflict with existing applications.
Would you like Setup to automatically configure postgresql and create Engine database, or prefer to perform that manually? (Automatic, Manual) [Automatic]:
–== OVIRT ENGINE CONFIGURATION ==–
Application mode (Virt, Gluster, Both) [Both]:
Engine admin password:
Confirm engine admin password:
–== STORAGE CONFIGURATION ==–
Default SAN wipe after delete (Yes, No) [No]:
–== PKI CONFIGURATION ==–
Organization name for certificate [mydomain.com]:
–== APACHE CONFIGURATION ==–Setup can configure apache to use SSL using a certificate issued from the internal CA.
Do you wish Setup to configure that, or prefer to perform that manually? (Automatic, Manual) [Automatic]:
Setup can configure the default page of the web server to present the application home page. This may conflict with existing applications.
Do you wish to set the application as the default page of the web server? (Yes, No) [Yes]:–== SYSTEM CONFIGURATION ==–Configure an NFS share on this server to be used as an ISO Domain? (Yes, No) [Yes]: no–== MISC CONFIGURATION ==—-== END OF CONFIGURATION ==–[ INFO ] Stage: Setup validation
[WARNING] Less than 16384MB of memory is available–== CONFIGURATION PREVIEW ==–Application mode : both
Default SAN wipe after delete : False
Firewall manager : firewalld
Update Firewall : True
Host FQDN : hostengine1.mydomain.com
Engine database secured connection : False
Engine database host : localhost
Engine database user name : engine
Engine database name : engine
Engine database port : 5432
Engine database host name validation : False
Engine installation : True
PKI organization : mydomain.com
Configure local Engine database : True
Set application as default page : True
Configure Apache SSL : True
Configure VMConsole Proxy : True
Engine Host FQDN : hostengine1.mydomain.com
Configure WebSocket Proxy : TruePlease confirm installation settings (OK, Cancel) [OK]:
[ INFO ] Stage: Transaction setup
[ INFO ] Stopping engine service
[ INFO ] Stopping ovirt-fence-kdump-listener service
[ INFO ] Stopping websocket-proxy service
[ INFO ] Stage: Misc configuration
[ INFO ] Stage: Package installation
[ INFO ] Stage: Misc configuration
[ INFO ] Initializing PostgreSQL
[ INFO ] Creating PostgreSQL ‚engine‘ database
[ INFO ] Configuring PostgreSQL
[ INFO ] Creating/refreshing Engine database schema
[ INFO ] Creating/refreshing Engine ‚internal‘ domain database schema
[ INFO ] Upgrading CA
[ INFO ] Creating CA
[ INFO ] Setting up ovirt-vmconsole proxy helper PKI artifacts
[ INFO ] Setting up ovirt-vmconsole SSH PKI artifacts
[ INFO ] Configuring WebSocket Proxy
[ INFO ] Generating post install configuration file ‚/etc/ovirt-engine-setup.conf.d/20-setup-ovirt-post.conf‘
[ INFO ] Stage: Transaction commit
[ INFO ] Stage: Closing up–== SUMMARY ==–[WARNING] Less than 16384MB of memory is available
SSH fingerprint: 2a:87:83:62:e1:75:29:55:ec:a1:44:f8:4e:73:2a:6b
Internal CA 7A:6C:3C:58:6C:66:AA:FB:44:33:2A:EF:0B:DC:01:8B:F8:D2:C8:BA
Note! If you want to gather statistical information you can install Reports and/or DWH:
http://www.ovirt.org/Ovirt_DWH
http://www.ovirt.org/Ovirt_Reports
Web access is enabled at:
http://hostengine1.mydomain.com:80/ovirt-engine
https://hostengine1.mydomain.com:443/ovirt-engine
Please use the user ‚admin@internal‘ and password specified in order to login–== END OF SUMMARY ==–[ INFO ] Starting engine service
[ INFO ] Restarting httpd
[ INFO ] Restarting ovirt-vmconsole proxy service
[ INFO ] Stage: Clean up
Log file is located at /var/log/ovirt-engine/setup/ovirt-engine-setup-20160316101816-69va1v.log
[ INFO ] Generating answer file ‚/var/lib/ovirt-engine/setup/answers/20160316120059-setup.conf‘
[ INFO ] Stage: Pre-termination
[ INFO ] Stage: Termination
[ INFO ] Execution of setup completed successfully
- nun geht es zurück zum oVirt Host wo die Installation der Engine abgeschlossen werden muss
- (1) Continue setup – oVirt-Engine installation is ready and ovirt-engine service is up
Checking for oVirt-Engine status at hostengine1.mydomain.com…
[ INFO ] Engine replied: DB Up!Welcome to Health Status!
[ INFO ] Acquiring internal CA cert from the engine
[ INFO ] The following CA certificate is going to be used, please immediately interrupt if not correct:
[ INFO ] Issuer: C=US, O=mydomain.com, CN=hostengine1.mydomain.com.44971, Subject: C=US, O=mydomain.com, CN=hostengine1.mydomain.com.44971, Fingerprint (SHA-1): 7A6C3C586C66AAFB44332AEF0BDC018BF8D2C8BA
[ INFO ] Connecting to the Engine
Enter the name of the cluster to which you want to add the host (Default) [Default]:
[ INFO ] Waiting for the host to become operational in the engine. This may take several minutes…
[ INFO ] The VDSM Host is now operational
[ INFO ] Saving hosted-engine configuration on the shared storage domain
Please shutdown the VM allowing the system to launch it as a monitored service.
The system will wait until the VM is down.
- (1) Continue setup – oVirt-Engine installation is ready and ovirt-engine service is up
- an dieser Stelle muss die Engine-VM heruntergefahren werden
- der Status der Engine-VM kann wie folgt angezeigt werden:
# hosted-engine –vm-status
–== Host 1 status ==–
Status up-to-date : True
Hostname : ovirt1.mydomain.com
Host ID : 1
Engine status : {„reason“: „bad vm status“, „health“: „bad“, „vm“: „up“, „detail“: „powering up“}
Score : 3400
stopped : False
Local maintenance : False
crc32 : 076c73a5
Host timestamp : 45782 - nach 1-2 Minuten sieht es dann wie folgt aus:
hosted-engine –vm-status
–== Host 1 status ==–
Status up-to-date : True
Hostname : ovirt1.mydomain.com
Host ID : 1
Engine status : {„health“: „good“, „vm“: „up“, „detail“: „up“}
Score : 3400
stopped : False
Local maintenance : False
crc32 : 723e2467
Host timestamp : 45871
Daten Domain und ISO Domain aktivieren
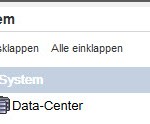
-> oVirt Menu System

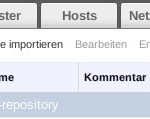
-> oVirt Menu System Speicher

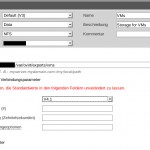
-> oVirt menu System NFS Domain

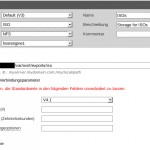
ISO Domain hinzufügen

An dieser Stelle müsste ich nochmal drüber schauen….
Interessiert in verschiedenste IT Themen, schreibe ich in diesem Blog über Software, Hardware, Smart Home, Games und vieles mehr. Ich berichte z.B. über die Installation und Konfiguration von Software als auch von Problemen mit dieser. News sind ebenso spannend, sodass ich auch über Updates, Releases und Neuigkeiten aus der IT berichte. Letztendlich nutze ich Taste-of-IT als eigene Dokumentation und Anlaufstelle bei wiederkehrenden Themen. Ich hoffe ich kann dich ebenso informieren und bei Problemen eine schnelle Lösung anbieten. Wer meinen Aufwand unterstützen möchte, kann gerne eine Tasse oder Pod Kaffe per PayPal spenden – vielen Dank.
